Old-Fashioned Chocolate Layer Cake
Nothing captures the comfort of home baking quite like the scent of chocolate cake rising in the oven. The rich aroma drifts through the kitchen, filling every corner with warmth and anticipation long before the first slice is served. I always know a special dessert is on its way when cocoa, butter, and vanilla begin working their magic together.
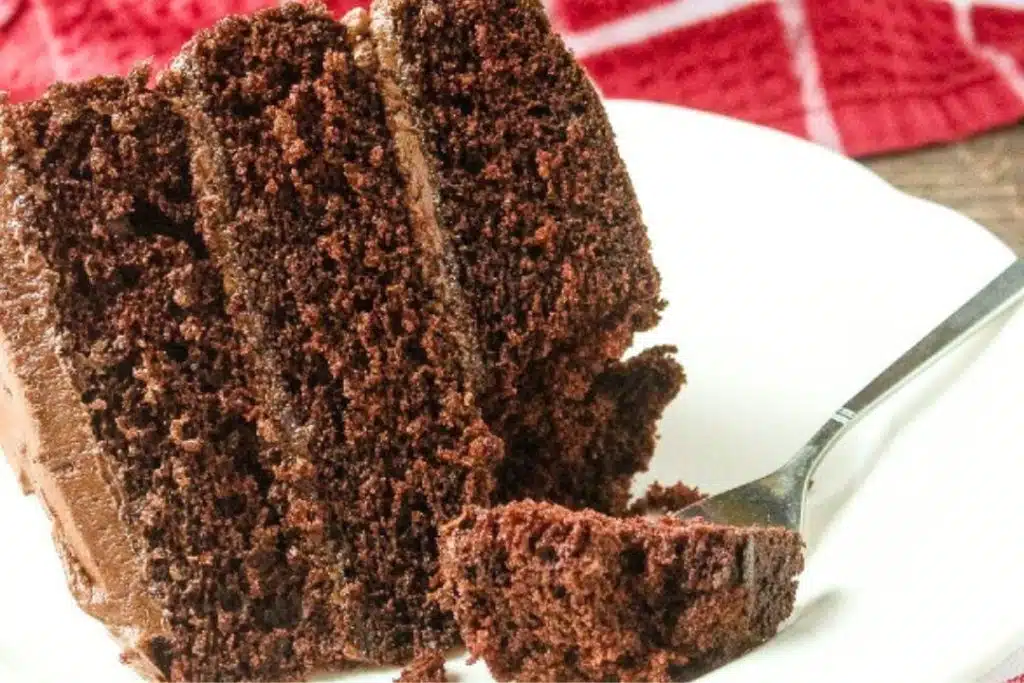
Old-Fashioned Chocolate Layer Cake has earned a permanent place in my recipe collection because it delivers everything I want from a classic dessert. Moist chocolate sponge, silky frosting, and deep cocoa flavor come together in a cake that feels both nostalgic and timeless. It is the recipe I reach for whenever I want a dependable showstopper that reminds everyone why homemade desserts never go out of style.
Why This Recipe Has Stood the Test of Time
Some recipes survive generation after generation because they simply work. This cake relies on straightforward ingredients rather than complicated techniques, producing layers that are soft, rich, and wonderfully balanced. Every bite delivers chocolate flavor without becoming overwhelmingly sweet.
I appreciate how versatile this recipe can be. It fits just as naturally on a birthday table as it does at a Sunday family dinner or holiday gathering. The simple appearance leaves plenty of room for decoration, but it is equally beautiful with nothing more than a generous layer of chocolate frosting.
The texture is another reason I return to this recipe so often. The crumb stays moist for days, making leftovers just as enjoyable as the freshly frosted cake. That kind of consistency is exactly what I look for in a reliable baking recipe.
Ingredients
For the Cake
- 2 cups (250g) all-purpose flour
- 2 cups (400g) granulated sugar
- ¾ cup (75g) unsweetened cocoa powder
- 2 teaspoons baking powder
- 1½ teaspoons baking soda
- 1 teaspoon salt
- 2 large eggs, room temperature
- 1 cup (240ml) whole milk
- ½ cup (120ml) vegetable oil
- 2 teaspoons pure vanilla extract
- 1 cup (240ml) hot coffee or hot water
For the Chocolate Buttercream
- 1½ cups (340g) unsalted butter, softened
- 5 cups (600g) powdered sugar, sifted
- ¾ cup (75g) unsweetened cocoa powder
- 2 teaspoons vanilla extract
- 4 to 6 tablespoons heavy cream
- ¼ teaspoon salt
Optional Garnishes
- Chocolate curls
- Chocolate sprinkles
- Fresh strawberries
- Cocoa powder for dusting
Kitchen Equipment
I like gathering every piece of equipment before mixing begins because chocolate cake batter comes together quickly. Two 8-inch round cake pans, parchment paper, mixing bowls, measuring cups, measuring spoons, a stand mixer or hand mixer, cooling racks, and an offset spatula are all I need for smooth preparation.
Accurate measurements matter far more in baking than they do in most savory recipes. I always level the flour and cocoa powder instead of packing them into measuring cups. That small habit helps create a tender cake with consistent texture every time.
Room-temperature eggs and milk blend effortlessly into the batter, producing a smoother mixture that bakes evenly. Taking a few minutes to prepare ingredients in advance makes the entire process more enjoyable.
Step-By-Step Instructions
Preheat the oven to 350°F (175°C). Grease two 8-inch cake pans, line the bottoms with parchment paper, and lightly grease the parchment. This extra step prevents sticking and makes removing the cakes incredibly easy.
In a large mixing bowl, whisk together the flour, sugar, cocoa powder, baking powder, baking soda, and salt until everything is evenly combined. Breaking up any cocoa lumps now creates a much smoother batter later.
Add the eggs, milk, vegetable oil, and vanilla extract to the dry ingredients. Mix on medium speed for about two minutes until the batter becomes smooth and well blended. It should already look glossy and rich before the final ingredient is added.
Slowly pour in the hot coffee while mixing on low speed. The batter will become noticeably thinner, but that is exactly what produces such a moist cake. The coffee enhances the chocolate flavor without making the finished cake taste like coffee.
Divide the batter evenly between the prepared pans and smooth the tops gently. Bake for 30 to 35 minutes, or until a toothpick inserted into the center comes out clean with only a few moist crumbs attached.
Let the cakes cool inside the pans for about 10 minutes before transferring them onto wire racks. Allow them to cool completely before adding frosting. Patience at this stage prevents melted frosting and uneven layers.
Preparing the Chocolate Buttercream
Beat the softened butter until it becomes pale and creamy. This creates the smooth base needed for light, fluffy frosting that spreads effortlessly across the cake.
Gradually mix in the powdered sugar and cocoa powder a little at a time. Add the vanilla extract, salt, and heavy cream, then continue beating for several minutes until the frosting becomes silky and easy to spread. If necessary, adjust the consistency with an extra spoonful of cream or powdered sugar.
The finished buttercream should hold its shape while remaining soft enough to glide across the cake. I always give it one final scrape around the bowl before decorating to ensure every ingredient is fully incorporated.
Assembling the Cake
Place one cake layer on a serving plate or cake stand. Spread a generous layer of chocolate buttercream evenly across the top, making sure it reaches the edges for a balanced filling in every slice.
Carefully position the second cake layer on top. Apply a thin crumb coat around the entire cake and refrigerate it for about 20 minutes. This simple step traps loose crumbs and creates a smooth foundation for the final frosting.
Finish with the remaining buttercream, smoothing the sides or creating decorative swirls with an offset spatula. Top the cake with chocolate curls, sprinkles, or fresh berries for an elegant finishing touch.
Helpful Baking Tips
Fresh cocoa powder makes a noticeable difference in flavor. Cocoa loses some of its intensity over time, so using a recently opened container helps produce the rich chocolate taste that defines this cake.
Avoid overmixing once the wet and dry ingredients come together. Mixing only until everything is incorporated keeps the crumb soft and tender instead of dense. The batter does not need to be perfectly smooth before adding the hot coffee.
Allow the cake to cool completely before frosting. Even slightly warm cake layers can soften the buttercream, making decorating much more difficult. Waiting a little longer always produces a cleaner, more professional-looking finish.
Decorating Ideas
Old-Fashioned Chocolate Layer Cake looks beautiful with classic chocolate swirls covering the entire surface. I sometimes use the back of a spoon to create gentle waves in the frosting, giving the cake a rustic appearance that feels welcoming and homemade.
Chocolate shavings instantly elevate the presentation without requiring advanced decorating skills. I simply run a vegetable peeler along a chocolate bar to create elegant curls that scatter naturally across the top.
Fresh fruit also pairs beautifully with rich chocolate. Strawberries, raspberries, or cherries provide bright color and a slight tartness that balances the sweetness of the frosting. The contrast makes every slice look as inviting as it tastes.
Storage Instructions
Store the finished cake in an airtight cake container at room temperature for up to three days. The frosting helps seal in moisture, allowing the sponge to stay soft long after baking day.
For longer storage, refrigerate the cake for up to five days. I always let it sit at room temperature for about 45 minutes before serving because the buttercream becomes smoother and the chocolate flavor develops more fully.
The cake layers can also be frozen before frosting. Wrap each layer tightly in plastic wrap followed by aluminum foil and freeze for up to three months. After thawing overnight in the refrigerator, they are ready to frost just like freshly baked layers.
Delicious Variations
Espresso lovers can replace the hot water with strong brewed coffee for even deeper chocolate flavor. The coffee enhances the cocoa naturally without dominating the finished dessert.
A layer of raspberry preserves between the cakes adds brightness and creates an elegant contrast with the rich buttercream. Peanut butter frosting also transforms this recipe into a completely different but equally satisfying dessert.
For an extra indulgent finish, drizzle cooled chocolate ganache over the frosted cake before serving. The glossy topping adds another layer of chocolate richness while creating an eye-catching presentation that feels worthy of any celebration.
Final Thoughts
Old-Fashioned Chocolate Layer Cake proves that classic recipes remain popular for good reason. Simple ingredients, careful preparation, and rich chocolate flavor come together in a dessert that never feels outdated. Every slice delivers moist cake, creamy frosting, and the comforting taste that generations of home bakers have loved.
I continue baking this recipe because it consistently delivers beautiful results without unnecessary complexity. Whether served at birthdays, holidays, anniversaries, or casual family dinners, it always disappears quickly from the dessert table. Once you make this Old-Fashioned Chocolate Layer Cake from scratch, it has a wonderful way of becoming the chocolate cake everyone requests again and again.