Chocolate Raspberry Mousse Cake
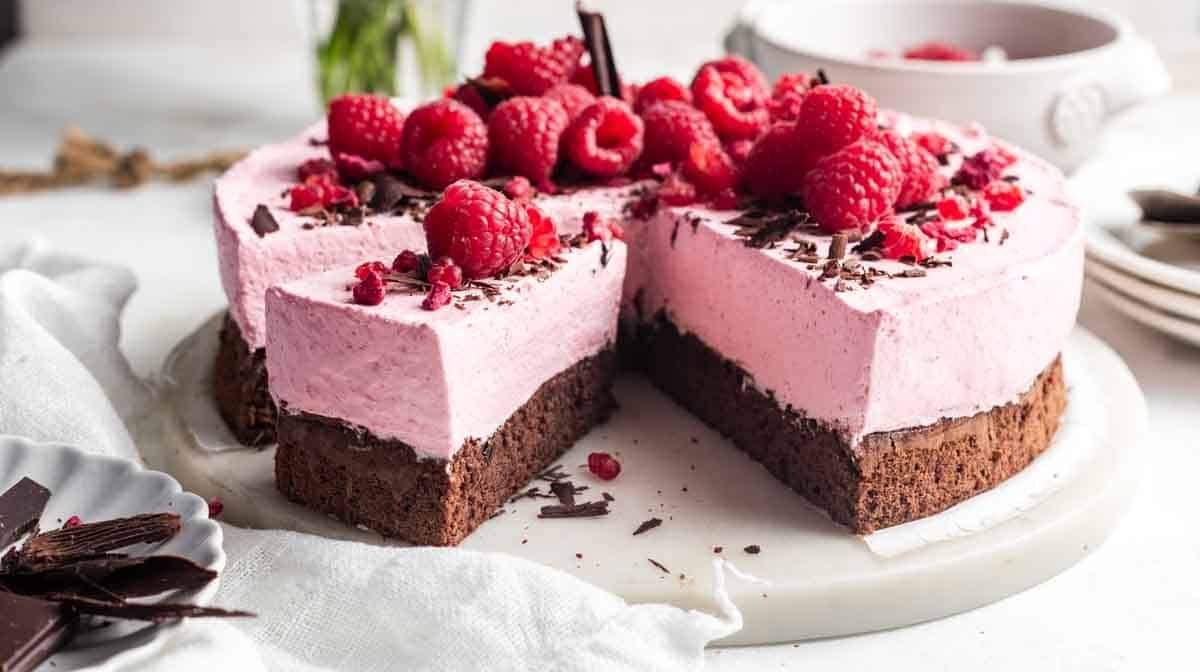
Rich chocolate and fresh raspberries create one of the most satisfying dessert combinations I have ever baked. The deep aroma of chocolate fills the kitchen while the bright fragrance of ripe berries adds a refreshing contrast that hints at the layers to come. By the time the mousse has chilled and the cake is fully assembled, it feels less like an ordinary dessert and more like the centerpiece of a memorable celebration.
Chocolate Raspberry Mousse Cake is a recipe I return to whenever I want to impress family and friends without sacrificing flavor for appearance. Moist chocolate cake, silky chocolate mousse, and vibrant raspberry filling come together in perfect harmony, creating a dessert that feels luxurious with every bite. It is equally suited for birthdays, anniversaries, Valentine’s Day, holiday dinners, or any gathering where an elegant homemade cake belongs at the center of the table.
Why Chocolate and Raspberry Are a Perfect Pair
Dark chocolate brings bold, rich flavor with subtle bittersweet notes, while raspberries provide natural brightness and gentle acidity. Together, they create balance instead of overwhelming sweetness, allowing each ingredient to enhance the other. Every bite delivers rich cocoa followed by a refreshing burst of fruit that keeps the dessert feeling surprisingly light.
The texture is another reason this recipe stands out. The soft chocolate sponge provides a sturdy yet tender foundation, the raspberry filling adds a smooth layer of fruit, and the airy chocolate mousse creates an almost cloud-like finish. These contrasting textures make every slice both satisfying and elegant.
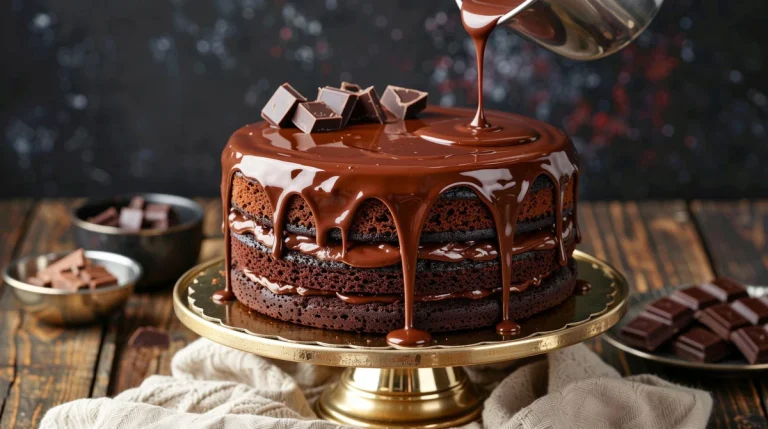
I also appreciate how visually striking this cake becomes without requiring complicated decorating techniques. The smooth mousse, glossy chocolate topping, and fresh raspberries create a presentation that looks refined while remaining completely achievable for home bakers.
Ingredients
For the Chocolate Cake
- 2 cups (250g) all-purpose flour
- 2 cups (400g) granulated sugar
- ¾ cup (75g) unsweetened cocoa powder
- 2 teaspoons baking powder
- 1½ teaspoons baking soda
- 1 teaspoon salt
- 2 large eggs, room temperature
- 1 cup (240ml) whole milk
- ½ cup (120ml) vegetable oil
- 2 teaspoons pure vanilla extract
- 1 cup (240ml) hot coffee
- 100g dark chocolate, melted and cooled slightly
For the Raspberry Filling
- 2 cups (250g) fresh or frozen raspberries
- ⅓ cup (65g) granulated sugar
- 1 tablespoon lemon juice
- 1 tablespoon cornstarch
- 2 tablespoons water
For the Chocolate Mousse
- 250g dark chocolate, finely chopped
- 2 cups (480ml) heavy whipping cream, divided
- 2 tablespoons powdered sugar
- 1 teaspoon vanilla extract
For the Chocolate Ganache
- 150g dark chocolate, finely chopped
- ½ cup (120ml) heavy cream
Optional Decorations
- Fresh raspberries
- Chocolate curls
- Cocoa powder
- Mint leaves
- Dark chocolate shavings
Kitchen Equipment
Preparing all of the equipment before I begin helps the entire process flow smoothly. Two 8-inch round cake pans, parchment paper, mixing bowls, measuring cups, measuring spoons, a saucepan, a whisk, a stand mixer or hand mixer, cooling racks, and an offset spatula are all essential for this recipe.
A springform pan can also be helpful during assembly because it supports the mousse while it chills. Although it is not absolutely necessary, it creates beautifully defined layers that make slicing much easier.
Good-quality dark chocolate is worth using here because it appears in both the mousse and the ganache. Rich chocolate provides deeper flavor while creating a smoother, silkier finish.
Step-By-Step Instructions
Preheat the oven to 350°F (175°C). Grease two 8-inch round cake pans, line the bottoms with parchment paper, and lightly grease the parchment to ensure the cakes release easily after baking.
In a large bowl, whisk together the flour, sugar, cocoa powder, baking powder, baking soda, and salt until thoroughly combined. This evenly distributes the leavening ingredients throughout the batter.
Add the eggs, milk, vegetable oil, vanilla extract, and melted dark chocolate. Beat until smooth before gradually stirring in the hot coffee. The batter will be fairly thin, producing an exceptionally moist cake.
Divide the batter evenly between the prepared pans and bake for 30 to 35 minutes, or until a toothpick inserted into the center comes out clean or with only a few moist crumbs attached.
Allow the cakes to cool in the pans for about 10 minutes before transferring them to wire racks. Let the layers cool completely before assembling.
Preparing the Raspberry Filling
Combine the raspberries, sugar, and lemon juice in a saucepan over medium heat. Stir occasionally until the berries soften and begin releasing their juices.
Mix the cornstarch with the water to create a smooth slurry, then stir it into the raspberry mixture. Continue cooking until the filling thickens enough to spread easily.
Allow the raspberry filling to cool completely before using it. Chilled filling creates cleaner layers and prevents the mousse from softening during assembly.
Making the Chocolate Mousse
Place the chopped dark chocolate into a heatproof bowl. Heat one cup of the heavy cream until it begins to simmer, then pour it over the chocolate. Allow it to rest for two minutes before stirring until smooth.
Let the chocolate cool until just slightly warm. In a separate bowl, whip the remaining heavy cream with the powdered sugar and vanilla extract until soft peaks form.
Fold the whipped cream gently into the cooled chocolate mixture using a spatula. Continue folding until no streaks remain and the mousse becomes smooth, airy, and evenly combined.
Preparing the Ganache
Heat the heavy cream until it just begins to simmer. Pour it over the chopped dark chocolate and allow it to stand for two minutes before stirring until completely smooth.
Let the ganache cool until it becomes slightly thicker but still pourable. This consistency creates a glossy finish without running excessively over the cake.
The ganache should coat the back of a spoon while flowing gently when poured.
Assembling the Cake
Place one cooled cake layer on a serving plate or inside a springform pan. Spread the cooled raspberry filling evenly across the surface, leaving a small border around the edges.
Spread half of the chocolate mousse over the raspberry layer before placing the second cake layer on top. Cover the top with the remaining mousse, smoothing it carefully with an offset spatula.
Refrigerate the cake for at least four hours or overnight until the mousse is completely set. Pour the cooled ganache over the top, allowing it to spread naturally before decorating with fresh raspberries, chocolate curls, and mint leaves.
Helpful Baking Tips
Use ripe raspberries whenever they are in season because their natural sweetness creates a brighter filling with more intense flavor. Frozen berries work equally well during the rest of the year and produce excellent results.
Allow each component to cool before assembling the cake. Warm filling or ganache can soften the mousse, making the layers less defined.
Fold the whipped cream gently into the chocolate rather than stirring vigorously. This preserves the air incorporated during whipping and keeps the mousse beautifully light.
Decorating Ideas
Chocolate Raspberry Mousse Cake looks stunning with a simple arrangement of fresh raspberries covering the top. Their vibrant red color contrasts beautifully with the glossy chocolate ganache and instantly signals the flavors inside.
Chocolate curls or finely grated dark chocolate add elegant texture while enhancing the cake’s rich appearance. I often scatter a few curls around the raspberries to create a refined finish.
A few fresh mint leaves provide a pop of green that complements both the chocolate and raspberries. The simple garnish gives the cake a polished presentation suitable for birthdays, anniversaries, and holiday celebrations.
Storage Instructions
Store the finished cake in the refrigerator in an airtight cake container for up to four days. The mousse remains firm while the raspberry filling continues to develop its flavor.
Remove the cake from the refrigerator about 20 minutes before serving. Allowing it to warm slightly softens the mousse and enhances the richness of the chocolate.
The chocolate cake layers can be baked ahead of time and frozen for up to three months. Wrap each layer tightly in plastic wrap followed by aluminum foil before freezing. Thaw overnight before assembling the cake with fresh mousse and raspberry filling.
Delicious Variations
Although I love the traditional version, a few simple additions create wonderful alternatives. A thin layer of raspberry preserves beneath the homemade filling intensifies the fruit flavor while adding extra moisture.
For a richer chocolate experience, stir a teaspoon of espresso powder into the cake batter. The coffee deepens the chocolate flavor without becoming noticeable in the finished dessert.
If you enjoy additional texture, sprinkle finely chopped toasted hazelnuts between the raspberry filling and chocolate mousse. Their subtle crunch pairs beautifully with both the chocolate and berries.
Final Thoughts
Chocolate Raspberry Mousse Cake is one of those desserts that feels elegant enough for life’s biggest celebrations while remaining completely achievable in a home kitchen. Moist chocolate sponge, vibrant raspberry filling, airy chocolate mousse, and glossy ganache come together to create a dessert that is rich, balanced, and visually stunning. Every slice offers layers of flavor and texture that make each bite memorable.
I continue baking this recipe because it consistently delivers impressive results without relying on overly complicated techniques. It is perfect for birthdays, anniversaries, holiday gatherings, dinner parties, or simply treating loved ones to something extraordinary. Once you make this Chocolate Raspberry Mousse Cake from scratch, it quickly becomes one of those treasured recipes that everyone hopes to see on the dessert table again.